How to Set Up a Skateboard: A Beginner's Step-by-Step Guide
Setting up a skateboard involves applying griptape, attaching the trucks, installing bearings in the wheels, and mounting the wheels onto the trucks. This beginner-friendly guide explains how to set up a skateboard from start to finish, including the tools you'll need, how to install each part, and common setup mistakes to avoid.
What You Need to Set Up a Skateboard
Gather all of your skateboard parts and tools before you start.
Before you start setting up your skateboard, make sure you have all of the parts and tools you need. A complete skateboard setup requires a deck, griptape, trucks, hardware, wheels, and bearings. You'll also need a few basic tools to put everything together.
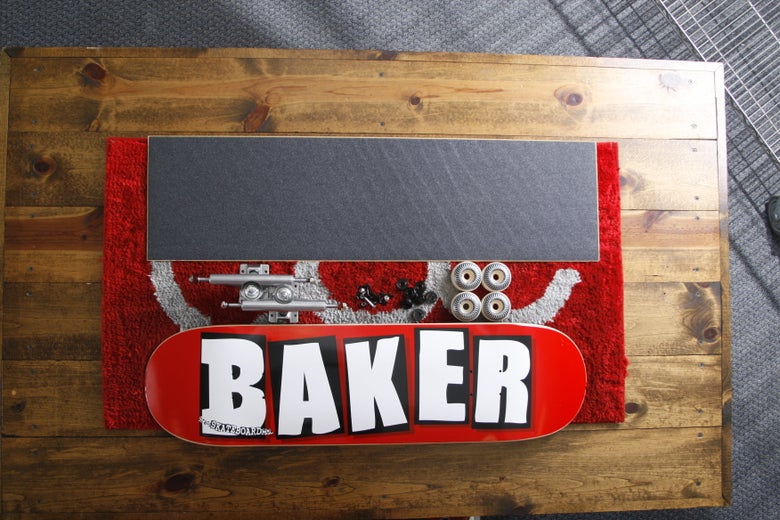
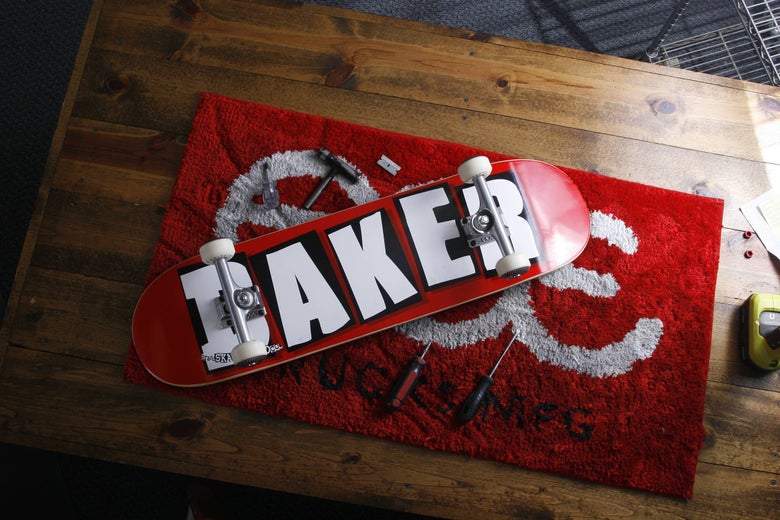
Lay out your skateboard deck, griptape, trucks, wheels, bearings, hardware, and tools before you begin.
- Skateboard deck
- Griptape
- Truck hardware
- Skateboard trucks
- Skateboard wheels
- 8 skateboard bearings
- Skate tool
- Razor blade
Don't Have a Skate Tool?
A skate tool is the easiest way to assemble a skateboard, but you can set up a board without one. Depending on your hardware and trucks, you'll generally need a Phillips-head screwdriver or Allen key, a wrench for the truck axle nuts, and a socket or wrench for the truck kingpin nut.
- Phillips-head screwdriver or Allen key, depending on your hardware
- Wrench or socket for the axle nuts
- Wrench or socket for the kingpin nut
Apply the Griptape
Align, apply, trim, and finish the griptape on your skateboard deck.
Applying griptape is the first major step when setting up a skateboard. Take your time during this part because properly applied griptape gives you a clean finish and a consistent surface to stand on.
Align Your Skateboard Deck
Before removing the backing from your griptape, figure out which end of the skateboard deck is the nose and which is the tail. The tail is generally the shorter, steeper end of the board, while the nose is usually longer and more gradual.
You can also look at the graphic or shape of the deck to help determine its orientation. Some skateboard decks have a graphic or logo positioned closer to the tail. Identifying the nose and tail before applying griptape is useful because you may want to mark the tail on your finished skateboard.
Some hardware kits also include one differently colored bolt. This bolt can be used to identify the nose or tail of your skateboard after the griptape has covered the deck.
Remove the Griptape Film and Apply It
Remove the backing from the griptape, similar to peeling the back from a large sticker. Hold the griptape above the skateboard deck and align it so that there is enough material extending beyond every edge of the board.
Start at one end of the deck and slowly press the griptape onto the board. Work gradually from the first point of contact toward the opposite end, using your hands to press the griptape down as you go. Taking your time here helps prevent wrinkles and air bubbles.
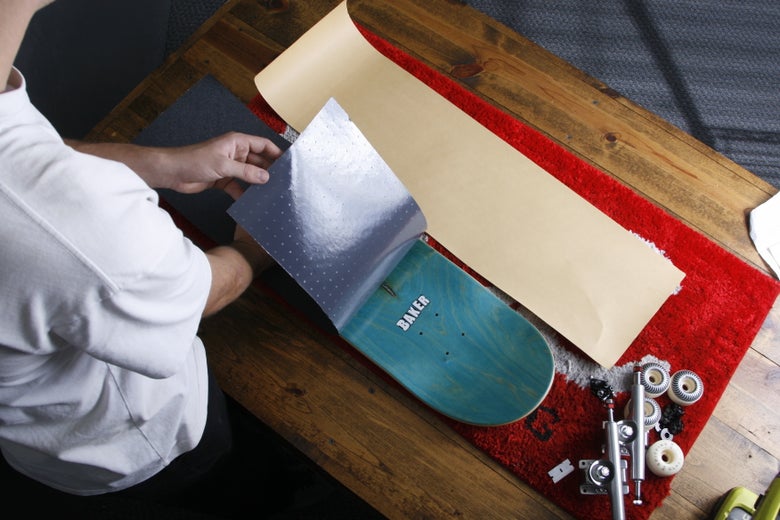
Center the griptape over the deck before allowing the adhesive to fully contact the board.
If you get an air bubble, carefully peel the griptape back and reapply that section. For a small bubble that won't come out, carefully puncture the bubble with a razor blade and press the griptape down to release the trapped air.
File the Edges of the Griptape
Once the griptape is firmly attached, use the shaft of a screwdriver or another suitable tool to rub around the edge of the skateboard deck. Press firmly enough to create a visible outline of the deck through the griptape.
This creates a clean white outline that you can follow when cutting the griptape. Work around the entire perimeter of the skateboard before you start cutting.
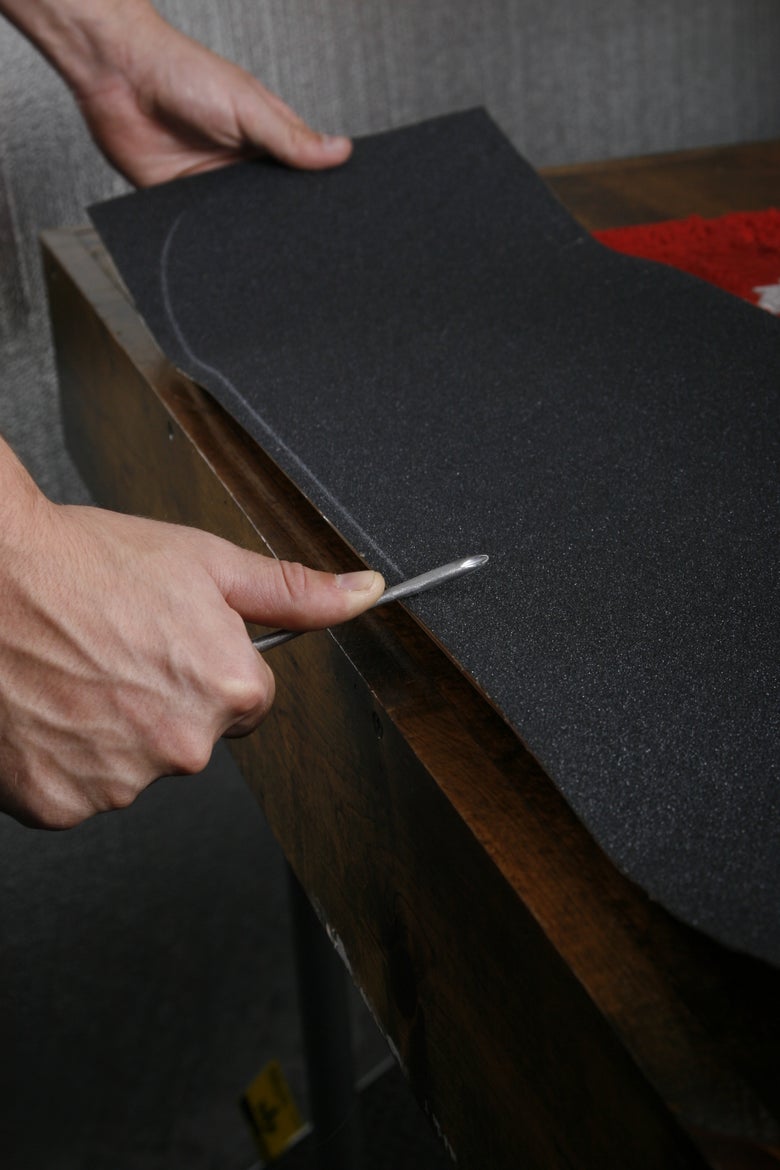
Score around the deck edge to create a visible cutting line in the excess griptape.
Cut the Griptape
Use a sharp razor blade to carefully cut along the outline you created. Start by making a small slit in the excess griptape, then follow the edge of the skateboard deck around the board.
Keep the blade angled slightly toward the outside of the deck and work slowly, especially around the nose and tail. Save a clean piece of the excess griptape because you can use it to sand the edges in the next step.
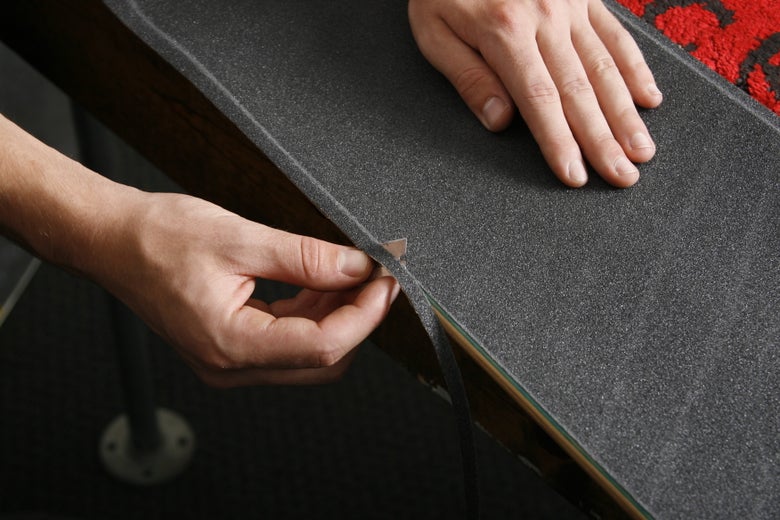
Carefully cut the excess griptape around the perimeter of the deck.
Razor blades are extremely sharp. Keep your fingers away from the cutting path and make controlled cuts rather than trying to force the blade through the griptape.
Sand the Griptape Edges
Take the extra piece of griptape you saved and use it to sand around the edge of the skateboard deck. This helps remove small flaky pieces of griptape and makes the edge of the grip sit cleanly against the deck.
Once you've finished sanding the perimeter, brush away the excess griptape before moving on to the trucks.
Attach the Skateboard Trucks
Install the mounting hardware and make sure both trucks face the correct direction.
With the griptape finished, the next step is attaching the skateboard trucks to the deck. Pay close attention to the direction of the trucks before tightening the hardware.
Poke Holes in the Griptape
The mounting holes in the skateboard deck are now covered by griptape. Turn the board over and locate the eight mounting holes from the underside of the deck.
Push the hardware through the holes from the underside of the deck so that the bolts puncture the griptape. Make sure all four holes for one truck are open before attaching the truck.
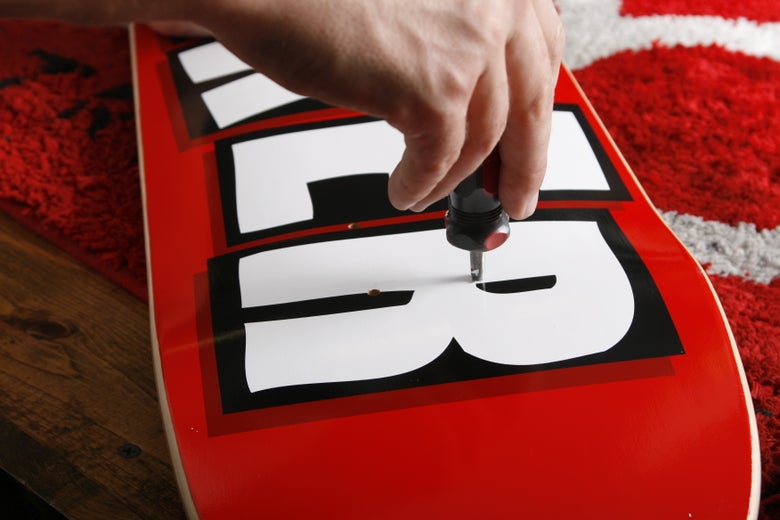
Open the mounting holes through the griptape so the truck hardware can pass through the deck.
Insert the Hardware Bolts
Insert four hardware bolts through the griptape side of the board so that the threaded ends stick out through the bottom of the deck. Keep the four bolts together so you can attach one truck at a time.
If your hardware includes one differently colored bolt, use it in the position you've chosen to identify the nose or tail of the skateboard.
Bolt the Trucks to the Board
With four bolts sticking through the bottom of the deck, place one truck over the bolts and line up all four mounting holes. Thread the nuts onto the bolts and tighten them evenly.
Make sure the kingpin — the large bolt with the bushings around it — points inward toward the center of the skateboard. The kingpins on both trucks should face each other.
Tighten the four mounting nuts evenly until the truck is securely attached to the deck. Repeat the process for the second truck.
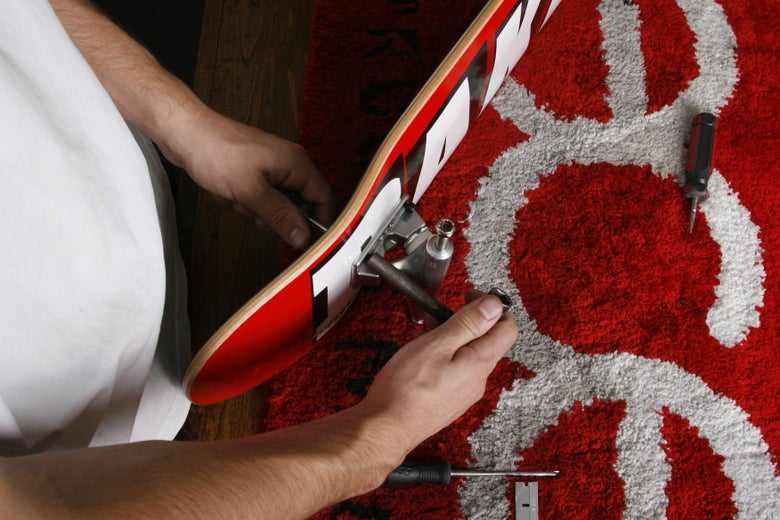
Secure the truck to the deck and tighten the mounting hardware evenly.
Install the Skateboard Bearings
Press two bearings into each wheel before mounting the wheels.
Skateboard wheels use two bearings each, so you'll need eight bearings for a complete skateboard setup. The bearings allow the wheels to rotate smoothly around the truck axles.
Put a Bearing on the Truck Axle
Place one skateboard bearing onto the axle of a truck. The bearing will act as a guide for pressing the bearing into the wheel.
If your bearings have a shield on only one side, follow the manufacturer's recommended orientation. Most modern skateboard bearings have shields on both sides, so orientation usually isn't something you need to worry about.
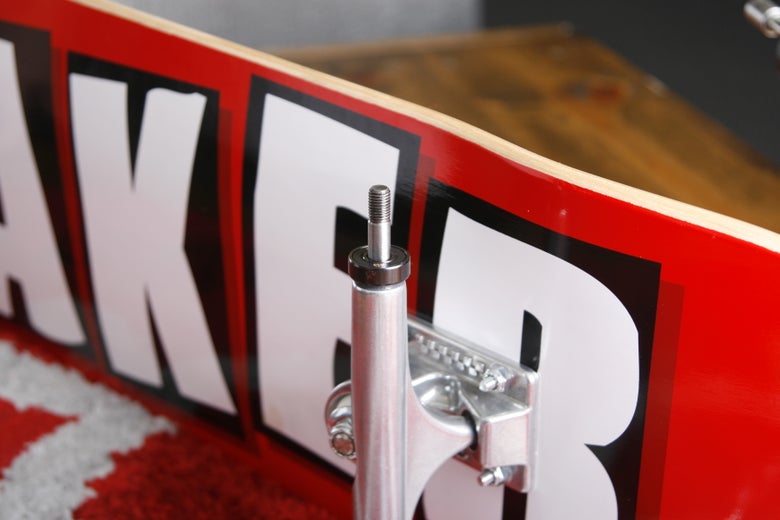
Place the bearing on the axle so the truck can guide it into the wheel.
Press the Wheel onto the Bearing
Place a skateboard wheel over the bearing and press the wheel down firmly and evenly. The bearing should slide into the bearing seat inside the wheel.
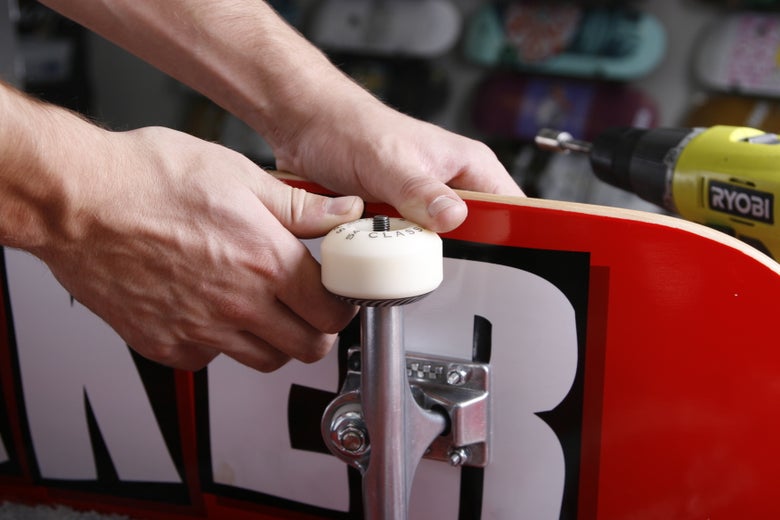
Press the wheel down evenly so the bearing seats completely inside the wheel.
Once the first bearing is seated, flip the wheel over and repeat the process with the second bearing. Each skateboard wheel requires two bearings.
Repeat the process until all four wheels have two bearings installed.
Press the wheel down evenly rather than forcing one side of the bearing into the wheel at an angle. If a bearing isn't sitting straight, remove it and try again rather than forcing it into place.
Attach the Skateboard Wheels
Install the wheels, washers, and axle nuts to finish the setup.
Once all eight bearings are installed in your four wheels, you can mount the wheels onto the skateboard trucks. Take your time tightening the axle nuts because the wheels need to spin freely.
Install the Washers
Your trucks may have come with small silver washers. If they did, place one washer onto the truck axle before installing the wheel.
After the wheel is installed, place another washer on the outside of the wheel before threading on the axle nut.
Put the Wheels on the Trucks
Slide a wheel with its two bearings installed onto the truck axle. It doesn't matter whether the graphic on the wheel faces outward or inward, so choose whichever appearance you prefer.
Spin the wheel on the axle before fully tightening the axle nut. This gives you a chance to check that the bearings are seated correctly and that the wheel spins smoothly.
Tighten the Axle Nuts
Thread the axle nut onto the truck axle and tighten it with your skate tool or wrench. The goal is to secure the wheel without squeezing the bearings so tightly that the wheel cannot spin freely.

The axle nut and bearing area should be secure while still allowing the wheel to rotate freely.
Your wheel should spin freely with very little side-to-side movement. If the wheel barely spins, loosen the axle nut slightly. If the wheel moves noticeably from side to side, tighten the nut a little more.
Repeat the process for the other three wheels.
Final Skateboard Setup Check
Give your skateboard a quick inspection before your first ride.
Before you ride your newly assembled skateboard, take a minute to check every part of the setup. A quick inspection can help catch a loose bolt, incorrectly installed truck, or wheel that is too tight.
A completed skateboard setup with the trucks, wheels, and hardware installed.
- Griptape is firmly attached
- Griptape edges are trimmed cleanly
- Both trucks are securely attached
- Kingpins face inward
- All eight bearings are installed
- All four wheels spin freely
- Axle nuts are secure but not too tight
- Truck mounting hardware is tight
Once everything looks good, stand on the board and test how the trucks feel before riding at speed. If the trucks feel too loose or too tight, adjust them gradually with your skate tool until the board feels comfortable and responsive.
Skateboard Setup FAQ
Answers to common questions beginners have when setting up a skateboard.
How long does it take to set up a skateboard?
A first-time skateboard setup can take around 30 to 60 minutes, especially if you're applying griptape yourself. Once you're familiar with the process, assembling a skateboard can be much quicker.
Which way should skateboard trucks face?
The kingpins on both skateboard trucks should face toward the center of the deck. In other words, the kingpins should face each other when both trucks are mounted correctly.
How many bearings does a skateboard need?
A standard skateboard needs eight bearings: two bearings for each of the four wheels.
How tight should skateboard wheel nuts be?
Skateboard wheel nuts should be tight enough to keep the wheel securely on the axle while still allowing the wheel to spin freely. If the wheel barely spins after tightening the nut, loosen it slightly.
Do I need a skate tool to set up a skateboard?
No. A skate tool is convenient, but you can set up a skateboard with the appropriate screwdrivers and wrenches. A skate tool simply puts the most commonly needed tools into one compact tool.
Can I set up a skateboard without experience?
Yes. Setting up a skateboard is straightforward once you understand what each part does and follow the assembly order. The most important things for beginners are applying the griptape carefully, installing the trucks in the correct direction, seating the bearings properly, and making sure the wheels spin freely.